Monday, 16 March 2020

7 बेहतरीन फ़िल्में जो सबसे कम समय में बनकर तैयार हुईं

7 बेहतरीन फ़िल्में जो सबसे कम समय में बनकर तैयार हुईं 

वो दो ढाई घण्टे की फ़िल्म जो हम सिनेमाघरों में देख कर आते हैं , उसे पसन्द या नापसंद करने में हम कुछ मिनट ही लगाते हैं। जबकि उसके बनने के पीछे कई महीनों की मेहनत और प्लानिंग शामिल होती है। कुछ फिल्मों के बनने में तो एक साल से भी ज़्यादा का समय लग जाता है। वहीं दूसरी तरफ कुछ फिल्में ऐसी भी है जो बहुत ही जल्दी बना ली गईं। आइये आपको बताएं वो 7 फिल्में जो रिकॉर्ड समय में बन कर तैयार हो गयी थीं।
1 जॉली एल एल बी 2 – 30 दिन
protips365

अक्षय कुमार स्टारर ये हिट फ़िल्म जो कि इमोशनल और कॉमिक ड्रामा का मिला जुला मिश्रण थी मात्र 30 दिन में बन गई थी। इस फ़िल्म के निर्देशक सुभाष कपूर ने इसे सच्ची लोकेशन्स पर फिल्माया था और इसी वजह से सेट बनाने और उसकी प्लानिंग करने का समय बच गया था।
2 हरामखोर – 16 दिन
protips365

आप यकीन नही करेंगे पर ये फ़िल्म केवल 16 दिनों में पूरी फ़िल्मा ली गई थी। इस फिल्म की शूटिंग एक गाँव में हुई थी और पूरे क्रू की मदद से इसे इतनी जल्दी शूट कर लिया गया था कि सिर्फ 16 दिनों में फिल्म पूरी तैयार थी। नवाजुद्दीन सिद्दीकी और श्वेता त्रिपाठी की मुख्य भूमिका वाली ये फिल्म एक बेहतरीन फिल्म है।
3 बरेली की बर्फी – 30 दिन
Bareily ki barfi

इस फिल्म की बेहतरीन कॉमिक टाइमिंग आज भी सबको हँसा जाती है। फिल्म की स्टारकास्ट भी बहुत ही अच्छी थी जिनकी मेहनत और लगन से अश्विनी तिवारी की ये फ़िल्म 30 दिन में ही पूरी कर ली गई थी और राजकुमार राव, आयुष्मान खुराना और कृति सैनन की केमिस्ट्री सबको भा गयी थी।
4 काबिल – 77 दिन
protips365
ये एक ऐसी फ़िल्म थी जिसने पावर और उसके गलत इस्तेमाल का मुद्दा समाज में उठाया था। ऋतिक रोशन और यामी गौतम के बेहतरीन अभिनय से सजी इस फ़िल्म को मात्र 77 दिनों में पूरा कर लिया गया था जबकि इसका शिड्यूल 88 दिनों का था।
5 तनु वेड्स मनु रिटर्न्स- 30 दिन
protips365
कंगना के डबल रोल वाली ये फ़िल्म जिसने बॉक्स ऑफिस पर झंडे गाड़ दिए थे केवल 30 दिनों में पूरी कर ली गई थी जबकि कंगना ने इस फिल्म के लिए अपने पूरे 50 दिन की डेट्स दे रखी थीं।
6 की एंड का – 45 दिन
protips365
ये बेहतरीन फ़िल्म जिसमें दिखाया गया था कि कैसे एक आदमी समाज के स्टीरियोटाइप को तोड़ता है और एक अलग तरह की ज़िंदगी चुनता है बॉक्स ऑफिस पर बहुत ज्यादा कमाल तो नहीं कर पायी पर एक हटकर कहानी तो लोगों के सामने रखी। आर बाल्की के निर्देशन में बनी ये फ़िल्म मात्र 45 दिनों में पूरी कर ली गई थी।
7 हाउसफुल 3 – 38 दिन
protips365

सभी जानते हैं कि अक्षय कुमार कितनी जल्दी अपनी फिल्में खत्म करते हैं । उनकी ये कॉमेडी फिल्म भी उन्होंने केवल 38 दिनों में पूरी कर डाली थी। और उनकी ये फ़िल्म भी बॉक्स ऑफिस पर हिट साबित हुई थी।

Smartphone discharges quickly? Here's how you can improve battery performance

Smartphone discharges quickly? Here's how you can improve battery performance.

Protips365

There is no doubt smartphones really a vital part of our daily life. Nowadays, smartphone is used in almost every field whether it is texting massage, watching videos, playing games or anything else. But it quite often that our smartphone's battery discharges between same really important work.

Some smartphones come with fast charging support and bigger battery but due to regular heavy use, it really don't works.
However, you can save your  battery by following these simple steps

Step 1: Turn off connectivity  when not needed
Turn off mobile data, WiFi or GPS connectivity if you are not using them. 
By this, your smartphone will not hang and the battery will last longer so you don't need to charge it very frequently. 

Step 2: Close apps running in the background
Sometimes we open an app and minimize it instead of closing it. 
When an app is not closed then it runs in the background and uses phones battery. 
When you allow an app to run in the background, this will hurt your smartphones performance and battery life.
So it is important to close such apps that that runs in the background. 

Step 3: Don't keep your display "Always On"
Some people have a keep the phone display 'Always On'. Obviously, that the longer the screen remains on, the more battery will be eaten up.

Accordingly, it is better not to keep the display always on.

In addition, you can set the timer. In this, you can assign the time of your choice. The screen will turn off after that time. This will lower phone battery consumption.

Step 4: Keep dark mode and power saver mode on

You can use dark mode to run more of the battery of the smartphone. This will not only save the battery but also will not affect your eyes too much.

Most apps like Facebook, Twitter, and WhatsApp have a dark mode feature. Dark mode apps consume less battery as compared to white background apps.
At night, you should use dark mode only.

Step 5: Keep your phone on silent mode to save battery

You can also save battery by putting the phone on silent mode. Putting on silent mode will not cause any trouble to the people working around you and your smartphone battery will also run more.


Tags: how to save phone battery android
how to save phone battery while traveling
how to save phone battery while using it
how can i save phone battery
how do you save phone battery
tips on how to save phone battery
what to do to save phone battery

Saturday, 14 March 2020

What is Internet

What is Internet
Protips365

The Internet is a global wide area network that connects computer systems across the world. It includes several high-bandwidth data lines that comprise the Internet "backbone." These lines are connected to major Internet hubs that circulate data to other locations, such as web servers and ISPs.
In order to connect to the Internet, you must have access to an Internet service provider (ISP), which acts the middleman between you and the Internet. Most ISPs offer broadband Internet access via a cable, DSL, or fibre connection. When you connect to the Internet using a public Wi-Fi signal, the Wi-Fi router is still connected to an ISP that provides Internet access. Even cellular data towers must connect to an Internet service provider to provide connected devices with access to the Internet.
The Internet provides different online services. Some examples include:
  • Web – a collection of billions of webpages that you can view with a web browser
  • Email – the most common method of sending and receiving messages online
  • Social media – websites and apps that allow people to share comments, photos, and videos
  • Online gaming – games that allow people to play with and against each other over the Internet
  • Software updates – operating system and application updates can typically be downloaded from the Internet
In the early days of the Internet, most people connected to the Internet using a home computer and a dial-up modem. DSL and cable modems eventually provided users with "always-on" connections. Now mobile devices, such as tablets and smartphones, make it possible for people to be connected to the Internet at all times. The Internet of Things has turned common appliances and home systems into "smart" devices that can be monitored and controlled over the Internet. As the Internet continues to grow and evolve, you can expect it to become an even more integral part of daily life.


internet, define internet
internet article, how internet works
internet define, what is internet, internet kya hai, internet system, 

iLovePDF Editor online

iLovePDF - Best Pdf Editor Tool and its 5 top Competitors

iLovePDF

iLovePDF is considered an excellent all-in-one solution for PDF related usages. You can convert, edit, merge, split, compress, rotate, unlock and watermark PDFs with iLovePDF in just a few clicks. iLovePDF has online, desktop and mobile versions, which covers a world-wild user crowd by offering cross-platform service. PDF users can easily access to iLovePDF via different systems and devices, including web, Windows, Mac, Linux, Android, iPhone, etc.
So how can we find a good alternative or backup plan to iLovePDF among thousands of PDF tools and websites? In this post, we'll explore and review some popular online services, desktop programs and mobile apps like iLovePDF, to hopefully offer you a full-scale reference for choosing an alternative to iLovePDF.
Online Alternatives to iLovePDF

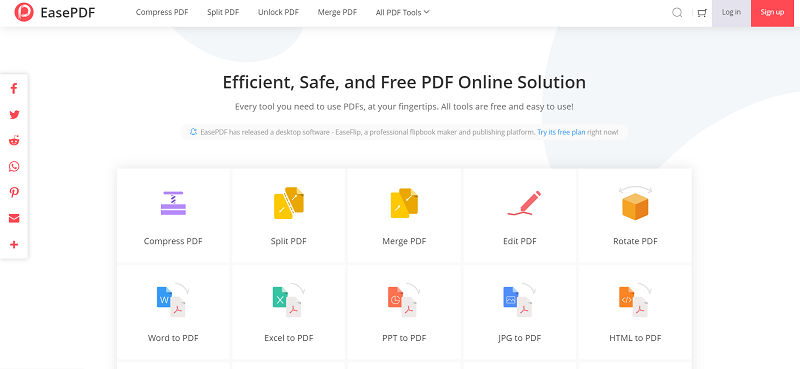
1.EasePDF

As a new rising star of PDF online service, Easepdf has tried the best to make PDF converting, editing and creating easier and more convenient for PDF users. With more than 20 free online tools and more to be developed, EasePDF provides professional, user-friendly, and easy-to-use services with high document security. The most outstanding tools of EasePDF include PDF to Word Converter, PDF to JPG Converter, PDF Merger, PDF Splitter, PDF Compressor, etc.
What makes EasePDF the best alternative to iLovePDF is the fact that they both offer 100% free online service to all users, and no registration required. As long as you have an internet connection, you can get EasePDF working for you anytime and anywhere. The high quality of conversion and the convenience of accessing Google Drive and Dropbox also make EasePDF your fist choice other than iLovePDF.
iLovePDF Alternative EasePDF
Pros:
· Fast processing.
· Batch conversion supported.
· No sign-up needed.
· 256-bit SSL Encryption of all your files.
· File automatic deletion in 24 hours.
Cons:
· Big files (above 30 MB) processing could be time-consuming.
Price: FREE!

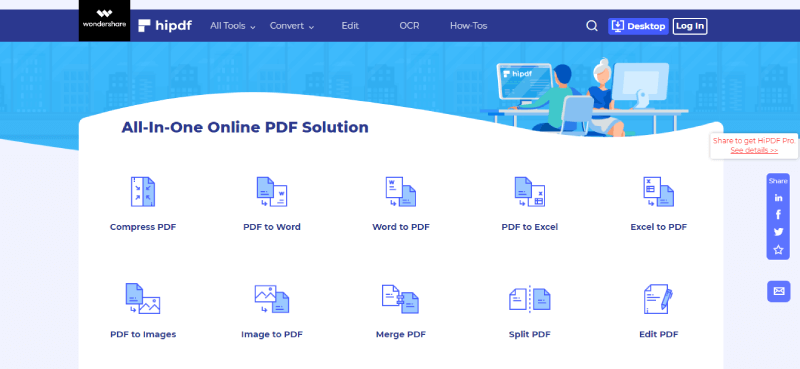
2. Hipdf

Hipdf is another all-in-one online PDF solution like iLovePDF. Hip provides a variety of online services that are packed in a neat user-friendly interface. With up to 30 different features for managing, editing and converting your PDF files, Hipdf makes even the most complex PDF-related tasks easy to perform in a few clicks. Free users will have certain limitations to these tools, like maximum file size registration and task registrations. For premium users, you will have access to batch processing and OCR service.

iLovePDF Alternative Hipdf
Pros:
· User-friendly interface.
· Easy to perform.
· 30 different PDF tools.
Cons:
· File size registration for free users.
· Need to pay for OCR service.
Price: $6/Month

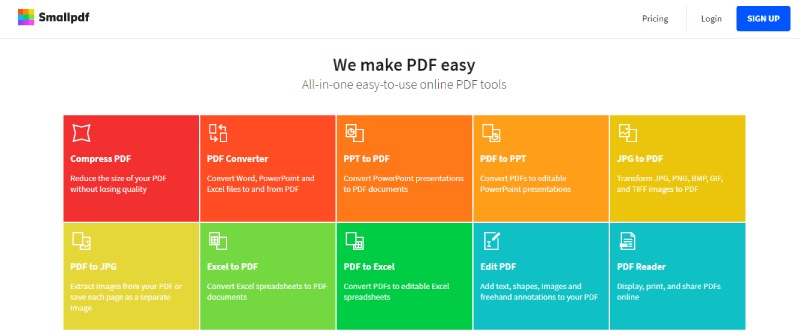
3. Smallpdf

With a neat and vivid interface, Smallpdf is the kind of online PDF tool that you would fall in love with at first sight. Determined to be different from those heavy and awkward-to-use converters, Smallpdf removed unused features and focus on the user experience to provide a fast, reliable and simple experience for PDF users. Smallpdf now has 18 online tools for you to work with PDF documents including PDF converting, editing, creating, merging, protecting, etc. Unlike iLovePDF, Smallpdf has much registration for free users.
iLovePDF Alternative Smallpdf
Pros:
· Beautiful and user-friendly interface.
· File automatic deletion in 1 hour.
· File security guarantee.
Cons:
· Many limitations for free users.
Price: $6/Month

4. LightPDF

As a compelling alternative to iLovePDF, Lightpdf is a free online service without ads and watermarks. There is no limitation to the size of the uploaded files and no task registration. LightPDF provides 20 online PDF tools. Those tools include PDF converters, PDF Editor and other functions like merge, split, sign, unlock PDF, etc. LightPDF is also very easy to operate, most of the functions can be done with 3 simple steps.
iLovePDF Alternative LightPDF
Pros:
· Easy to use.
· No ads.
· No watermarks.
· No registration required.
Cons:
· No access to cloud drives.
Price: FREE!

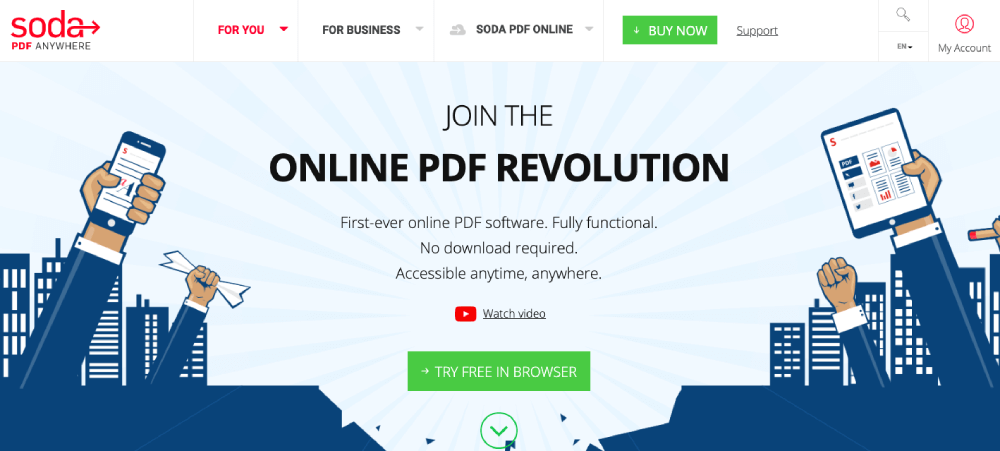
5. Soda PDF Online

 Soda pdf online is a smart, reliable and accessible PDF web application that brings true innovation to the PDF world. It allows you to edit, convert, annotate, e-sign and secure PDFs on any device. With a unique all-in-one operating interface, Soda PDF Online stands out from other online PDF tools. Users can create, edit, convert and sign a PDF without jumping to other web pages. What's more, Soda PDF has nearly the most comprehensive editing and preview functions across the network.
iLovePDF Alternative Soda PDF
Pros:
· All-in-one operating interface.
· Comprehensive functions.
· Create PDF from URL.
Cons:
· Charge for many essential and commonly used features.
· A little complicated to use.
Price: $48/Year


i love pdf to word,i love pdf,image to pdf,i love pdf to jpg,i love pdf compress,i love pdf converter,i love pdf app,i love pdf all,i love pdf alternative,i love pdf editor

How to Download My Lost Aadhaar Card

 Lost your Aadhaar card? Here's how you can get it
Protips365
Earlier, if you lost your Aadhaar card, you could not get it reprinted. You had to download e-version from the UIDAI website and present it as identity proof which was acceptable. The Unique Identification Authority of India (UIDAI) has launched a new service, on a pilot basis, on its website allowing people to order a reprint of their Aadhaar card after paying a nominal fee.
This service will be useful for those Aadhaar cardholders who have lost or misplaced their Aadhaar cards and are left to use the e-version from the UIDAI website.

Now as per the UIDAI website, one can get his/her Aadhaar card reprinted by paying a nominal fee of Rs 50 (inclusive of GST and speed post charges). The reprinted Aadhaar letter will be handed over to India Post within 5 working days to be delivered to your registered address via speed post.

You can use either your Aadhaar number or Virtual Identification Number (VID) for putting in a request to reprint your Aadhaar card.

To order your reprinted Aadhaar card, your mobile number must be registered with the Aadhaar database as a one-time password (OTP) will be sent to that number. 

However, in case no mobile number is registered with your Aadhaar number, then you may get your Aadhaar card reprinted via a non-registered number, however, you will not be able to preview the details.


Here's a step-by-step guide on how to get your Aadhaar card reprinted.

Step 1: Visit UIDAI's website, www.uidai.gov.in.

Step 2: Under the Aadhaar services, select 'Order Aadhaar Reprint (Pilot basis)'.
Protips365


Step 3: A new tab will open on your computer screen. You will be required to enter your 12-digit Aadhaar number or 16-digit VID number and security code. If the mobile number is not registered against your Aadhaar number in UIDAI's database, then select the box to indicate this. If mobile number is registered against your Aadhaar number, then click on 'Send OTP'.
Protips365

Step 4: An OTP will be sent to your registered mobile number. Remember this OTP is valid for 10 minutes only.

Step 5: Enter the OTP and select the box agreeing to 'Terms and Conditions'. Click on Submit.

Step 6: Once the correct OTP is entered, you will be able to verify your Aadhaar details (Only if mobile number is registered in the Aadhaar database).
Check if the Aadhaar details reflecting on your computer screen are correct. In case the details mentioned on your computer screen are inaccurate or missing, you will be required to visit nearest the Aadhaar Seva Kendra to get the details corrected.

Step 7: Once the Aadhaar details are verified, click on the 'Make Payment' option. You will be redirected to the payment gateway.

Step 8: You can make the payment via credit card, debit card, Net banking or UPI, as per your convenience. Rs 50 will be charged for getting your Aadhaar card reprinted. Enter the payment details and click on 'Pay Now'.
Protips365

Step 9: Once the payment is successful, an acknowledgement will be shown on your screen. You can also download the acknowledgement slip. A message will be sent to your registered mobile number with the service request number (SRN).
Download My Lost Aadhaar Card


If mobile number is not registered
In case your mobile number is not registered against your Aadhaar number, in step 3 mentioned above, select the tick box indicating this.
You will be required to enter the alternative/non-registered mobile number and click on 'OTP'. 
An OTP will be sent to the alternate number. However, you will not be able to preview and verify your Aadhaar details before making a payment.


Tracking the status of your reprint

According to the FAQs mentioned on the UIDAI website, you can track the status of your request till the dispatch of the Aadhaar card. Follow the steps below to track it:
Step 1: https://resident.uidai.gov.in/check-aadhaar-reprint

Step 2: Enter the 28 digit SRN code as received by you in your acknowledgement receipt or on your mobile.

Step 3: Enter the 12 digit Aadhaar number (UID).
Protips365


Step 4: Enter the security code and click on submit.
If the details mentioned are correct, the status will be displayed on your screen.

How to Download Aadhaar

How to download Aadhaar from uidai website.


How to download Aadhaar

 If you have applied for an Aadhaar but have not received it yet, you can download a PDF of it online. Here's a guide to how you can download it online

Here's a step-by-step guide on how you can download Aadhaar online:


Step 1. Go to the UIDAI website: www.uidai.gov.in

Step 2. Click on the download Aadhaar option under the 'My Aadhaar' tab.
How to download Aadhaar

Step 3. Enter your 28 digit enrolment ID as mentioned on the acknowledgement slip or your 12-digit Aadhaar number or 16 digit Virtual ID and fill the captcha code.

Step 4. You can also choose if you want masked Aadhaar copy. In the masked of adhaar, the first eight digits of your Aadhaar card will be safeguarded.
How to download Aadhaar


Step 5. Click on 'Send OTP' if you have not generated 'TOTP using m-Aadhaar app'. A six-digit OTP will be sent to your mobile number. The OTP will be valid for 10 minutes.


Step 6. Submit the OTP. You will be required to undertake a survey. Click on 'Verify and Download'. A PDF file will be downloaded on your computer.
How to download Aadhaar

Step 7. This file is password protected. The password for the file is the first four letters of your name as mentioned on Aadhaar card which you will have to enter in capital letters and your year of birth in YYYY format. For instance, if your name is SNEHA and you were born in the year 1980, then your password will be SNEH1980.


Frequently Asked Questions 


What is Aadhaar number?


The Aadhaar number is a 12-digit unique identification number that an individual can obtain by submitting identity proof, address proof, date of birth and biometrics.

Is an Aadhaar card downloaded from UIDAI website valid?

According to a UIDAI circular dated April 28, 2017, the Aadhaar card downloaded from UIDAI website, i.e., the-Aadhaar is valid as a proof of identity. e-Aadhaar should be treated on par with a printed Aadhaar letter.

What is the password of the downloaded Aadhaar card?

The password to open a downloaded Aadhaar card is a combination of the first four letters of your name in CAPITAL and your year of birth. For instance, if your name is Raj Kumar and you were born in the year 1986, then the password will be RAJK1986.

To download Aadhaar, what do I need?

To download Aadhaar, one needs either Aadhaar number or Enrolment ID or virtual ID.

Is mobile number mandatory to download Aadhaar?

Yes, your mobile number must be registered in the UIDAI records to download Aadhaar. A One-Time Password will be sent to your mobile phone during the process of downloading Aadhaar.

Friday, 13 March 2020

Youtube To Mp3 - Download Youtube videos FREE

Youtube To Mp3 - Download Youtube videos FREE


Youtube To Mp3

If you want to download youtube videos then we have 3 best ways to download youtube videos within seconds. In this blog we will discuss 3 methods to download youtube videos instantly.


1. Download youtube videos by using ss on a Browser

Youtube To Mp3


Do you believe that downloading YouTube videos online can be done without an add-on?
  1. Just add “ss” to the video URL to launch the youtube downloading process.
  2. Your download will begin in short time
Example

Original URL: https://youtube.com/watch?v=YOcmSsBfafg

URL with ss: https://ssyoutube.com/watch?v=YOcmSsBfafg

You will be redirected to a youtube video downloader website and your video will start downloading. 

2. Download youtube videos by Copying video url

Youtube To Mp3

If you are watching youtube on desktop then copy video link from search bar. 
If you are watching video from youtube app then click on share button afterwards select copy to clipboard option. 
After copying the link go to new tab in web browser and search for savefromnet. 
After opening the website paste your link there. 
Your video will start to  download. 

3. Download youtube videos by using Youtube Video downloader applications


You can download youtube videos by installing some YouTube video downloader applications on your mobile. Some common mobile applications are vidmate and tubemate.

youtube to mp3
youtube download save
youtube to mp3 songs download youtube to mp4 480p
youtube to mp4 1080p
youtube to mp4
from youtube to mp4 hd
from youtube to mp4 1080p
from youtube to mp4 high quality

HOW TO EARN MONEY ONLINE - START YOUR OWN BLOG

HOW TO EARN MONEY    ONLINE - START YOUR OWN BLOG

Protips365

If you want to earn money online just by working at home then there are several ways for like Data entry jobs, Freelancing, Blogging, Taking surveys, Editing & Proofreading etc. One of the best way to earn money online is to start Blogging. Millions of people across the globe earning thousands of dollars by blogging. Today we will discuss how we can start blogging and earn money online.

Why should we start a blog?

Why blogging

  • It helps us to strengthen our  composition and thinking skills
  • To helps out to be a eshtablish expert
  • It helps to build self-confidence
  • Builds a strong network with others in the industry
  • To make money by blogging

Steps to start blogging

Here are seven easy steps to follow that will assist you to start your blog with ease. These are the most important things when it comes to starting a blog that you need to keep in mind. If you know these things, you can create a blog in less than 30 minutes. These steps are:

Step 1: Select a perfect niche(Topic) for your blog

To become a profitable blogger, you must first find your niche and discover who your ideal readers are. In short, a niche is a topic that you write about most often, or even exclusively in your blogs. Niche blogging is creating a blog to advertise a very specific market. Niche blogs are easy to monetize and they usually contain affiliate links, advertisements, etc and that's mostly how they become profitable.

To become a profitable blogger you have to choose the right niche and work on achieving the highest level of knowledge of that topic. By selecting the niche of interest and having your own point of opinion you'll be able to distinguish your personal blog from the competition.

Step 2: Choose a blogging platform

When it comes to blogging platforms you have the following options- free and self-hosted.

Free platforms

For many new bloggers, the availability of free tools such as Blogger or Tumblr is tempting. Of course, there is one big advantage, that it is free. By keeping your blog on a free platform, you let the platform own your name. You'll be subject to their rules and restrictions.

Self-hosted platforms

Self-hosted platforms allow you to run a blog using your own domain. Aside from following your domain registrar and web hosting company's rules, you're fully in charge of your blog and its contents. You have a number of choices when it comes to self-hosted systems (also called a Content Management System or CMS). The most common is Wordpress.org

Step 3: Pick a domain name

How to create a blog

Your domain name will be the name by which you will be recognized online, no matter what niche you choose. It's your special address on the Internet. Users who know your domain/URL (uniform resource locator) can simply search it into their browser's address bar. Others will be able to find you through search engines such as Google and Bing, so you definitely need to find a unique domain name.
There are a number of websites which will provide free or paid domain names. The most popular is GoDaddy.com.Generally the cost of a dot com domain ranges between INR 700 to 1500 per month. You can go with other cheaper extensions for example "dot net" or "dot me."

Step 4: Get a web hosting account

How to create a blog

After selecting a domain name, selecting reliable hosting services will be one of the most important decisions you make. The host makes sure your site is available 24/7 to potential readers and it's where your files are stored online.
Most hosting companies also offer domain registration services. I suggest keeping it all under your hosting account for hassle-free management and maintenance.
Some of the best providers are Bluehost, Hostinger etc.

Step 5: Starting a blog on WordPress

Now we are all set to start creating our blog on WordPress. We have to follow these steps to create our first blog
Step 1: Visit the Bluehost(Web hosting site) Then click the “Get Started Now” button.
Protips365

Step 2: Select your blog's hosting plan
How to create blogs

You should start by selecting your plan. If this is your very first one, you should go with the basic one at least until you explore your options.

Step 3: Input your blog's domain name
Just type in the desired domain in this “new domain” box and BlueHost will show you whether it's available or not. If not, it will provide you with a list of similar names for you to choose from.
How to create blogs

Step 4: Register for         Bluehost

After you pick out your domain name just fill in the required details and you are all set.
How to create blogs

 Step 6: Launch your WordPress blogpost with Bluehost

Congratulations, we are almost there! Once you have your domain name and web hosting connected, it’s time to set up WordPress. Go to your Bluehost cPanel account, find the ‘My Sites’ section and click Install WordPress.
How to create blogs

Once this is done, go back to the cPanel and hit Launch.

Step 6: Find the right theme (blog design)

How to create blogs

Prefer a theme that looks great, but also works for your special content needs. The default theme that comes with your WordPress blog installed is Twenty Nineteen— while it’s a good starter theme, you’ll want to choose a theme that is unique and compatible with your niche. 
After choosing a theme of your choice, you are now ready to log in to the WordPress dashboard.
Once you login to your WordPress dashboard, you will be prompted with the “Welcome” message.
You can choose to accept the type of website you are about to create. 
How to create blogs

Click the “Launch” button and you’ll be seen online within seconds. After clicking the “Launch” button, you will just need to fill the two most important fields for your site. The title and description, which will tell your future visitors what is your site all about.
How to create blogs
Congratulations, you just understood how to create a blog. Your new blog is available to launch, so get ready to learn how to blog!


Step 7: Write content and promote your blog

To produce quality content, you will have to use your originality and imagination. However, you have to believe that some content performs better than others. But again, you should start creating content that you feel comfortable with, right for your readers, and for your blog.

The success of your blog promotion will depend on the capacity to engage in your niche. The more you promote your blog, the more chances of getting the desired results. Don't feel ashamed in sharing your blog among friends, family and relatives.

Submit your blog to search engine

It only takes a minute, and it will help to get your blog indexed. To submit your blog URL to Google, sign in to your Google Account and go to the Submit URL option in Webmaster Tools. For extra credit, submit your site to Bing.